Four or so years ago we found a quilt for my daughter at our church’s craft bazaar. My son asked for a special quilt too. Fabric was purchased and 7″ blocks were cut. A simple diagonal pattern was laid out, stacked into columns, and put in a bag.
More recently my son asked for a different layout. Then we were home, for an undetermined amount of time. We needed something to help us process and heal. My son needed something. I asked him if he still wanted a quilt and if he was ready to layout the quilt the way he wanted it. I’m so happy he still wanted a quilt. I’m super happy that he wanted to help with the design and that he still liked the fabric.
Laying out quilt squares
I offered a few suggestions, but tried to leave it be so it could be his design.
Getting close to the desired layout of 13×13 7″ squares.
It makes it extra special that it’s the way he wanted it. April 3rd the new kid approved layout was finished. The columns were stacked and ready for the sewing to start.
Stack of quilting squares ready to be sewn into columns.
It was about two weeks before sewing started. It was my job to sew the columns. I was partially waiting for the batting to arrive, a little procrastinating, and still really busy with life! It felt like we should have more time since we were at home with no where to go, but we were still busy.
Columns of squares coming together.
A month after the squares were laid out the top was together! The backing only had to have it’s seam ripped out once. I forgot that folded directional fabric would need to be managed properly after it was cut in half! Putting everything together required moving furniture and cleaning the floor, so I could have a large enough space to put all the pieces together.
Making a quilt sandwich.Pinned and ready to sew.
By the end of the day I had the binding together! I decided to stitch in the ditch in concentric squares. (Is that a thing? I know concentric circles is a thing.) It was painful to realize I hadn’t pinned quite enough after the first line of quilting. My seam ripper got quite a work out on May 2. Once I laid the quilt out flat and got enough pins, one per square, around and around, things went smoother. Getting to the center square was a challenge, but somehow it worked.
Sewing around the center square of the quilt.
I spent the next day working through all the concentric squares of quilting. The quilt was finished after a particularly difficult day. It was much needed and appreciated. One beautiful process completed.
Little’s birthday has come at a perfect time to align with another Tryazon party. This year, she decided to have a paint party so I applied to host the Tryazon Plaid Learn to Paint party. I was super excited when we were one of the 100 hosts selected. Of course, if you know Little, you know cats are her thing. So to celebrate the birthday girl we chose to do a mother daughter paint party. Guests could choose which design to paint or paint together! It worked out fabulously.
The Tryazon Plaid Learn to Paint Party pack came with all the paints needed, a set of brushes for each person, and 12×12″ wooden panel to paint on. While reading through my host guide I came across a short line, “… remove the protective seal from the paint bottles, remove the adhesive label from each wood canvas, and take the brushes out of the package.” I had been so focused on the paint I hadn’t even thought about the wood panels. I got to work that night removing all the packaging from the materials.
Then I tried to peel a sticker off of one of the wooden panels. Now, those of you who know me know that I peel off all the stickers. But it’s not usually off of unfinished wooden surfaces. I was stumped. After shredding a sticker and pulling up wood particles, I called Plaid customer support. I had a pile of these to tackle and didn’t have time to waste trying to experiment. The first representative I spoke with said to use a blow dryer or iron them off with foil over the sticker. Since I don’t own a blow dryer I chose the iron route. True to the representative’s word the stickers came right up after ironing them. However they left a huge swath of adhesive residue. I called again and was forwarded to a voice mail box. I left a couple messages with Tim. I was also sending FB messages to Plaid Crafts and I got another name and number from the Plaid Crafts Facebook team. I finally connected with Darlane at Plaid. She suggested using alcohol and a plastic scrubbie to get the adhesive off. I didn’t have much luck with that. My husband broke out the acetone. That finally cut through the sticky, but it still took a lot of elbow grease to get my pile of adhesive up from the board.
I was at the end of my patience. If I had purchased these for my own personal use I would have returned the product or even thrown it in the garbage. I was sick of all the fussing. In desperation to be a good Tryazon host I put a thin coat of white Apple Barrel paint over the adhesive and waited anxiously for it to dry. It worked! I was so relieved. The adhesive rectangle could still be seen, but it was no longer tacky.
My daughter had a whole plan written up for her birthday celebration. Along with calling for invitations, streamers, paint, brushes, canvases, aprons, food, pink lemon aid, and a number 8 candle, it included the design for the sweets. We had a great time making pretzel stick paint brushes to go with our M&M paints on the paint palette cupcakes.
She said we also needed a cat painting. Cats are her favorite thing. I searched the web for a cat painting tutorial and was delighted to run across Tracie Kiernan’s Step by Step painting of How to Paint a Cat and Moon. She has a great video posted that walks you through all the steps needed to create a super cute painting of a cat in a tree in front of a moon. My daughter loved it!
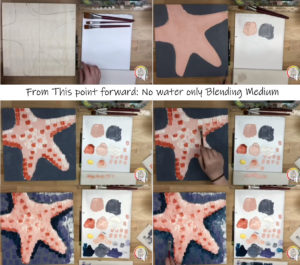
To help my guests get started, I drew the dividing grid on the wooden panels for them. Watching the live stream of the Under the Sea paint party on Thursday before our event helped me realize that I would also need a lot of paper towels for my guests to use. After previewing the videos I thought it would be nice for guests to have a painting steps at a glance. I created handouts for guests to help them see what was coming next. It also helped them choose which painting they would like to create at the party; sea star or cat.
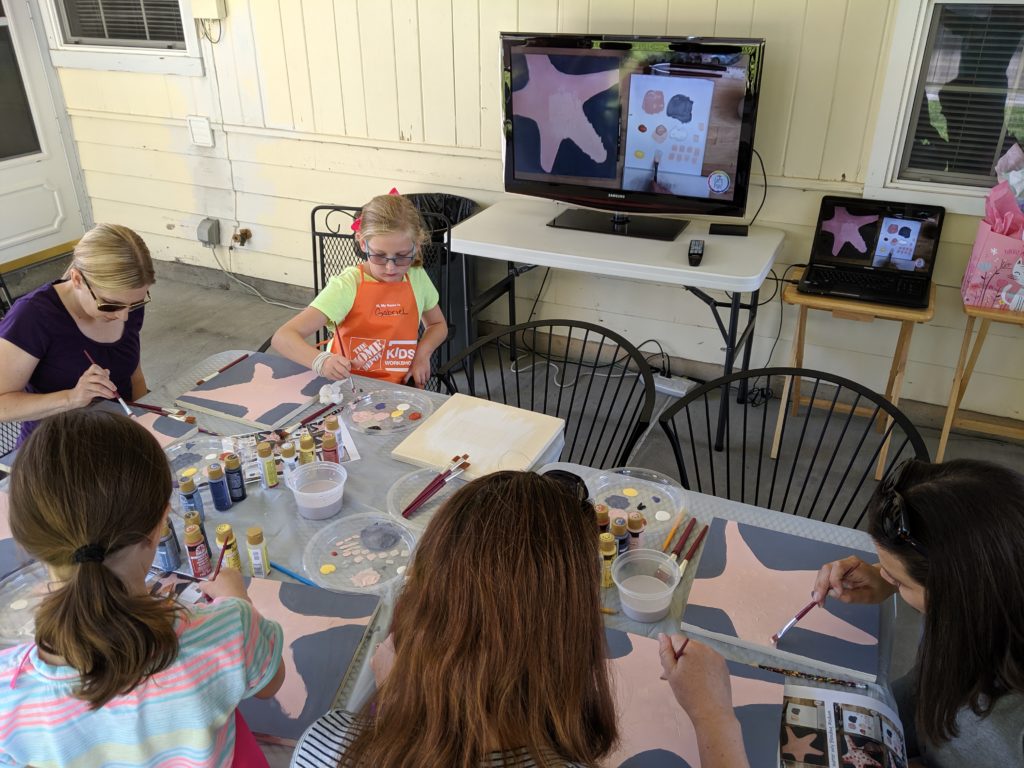
My husband stepped up in the tech support department. I told him my ideas about having tablets out for guests to watch while painting or using laptops so we could hook up speakers or guests could use their phones and work at their own pace. While I was out hunting down a number 8 candle he really pulled out all the stops. We were painting outside and he informed me that non of our techie screens would show up well in the bright daylight. He moved our TV out under the patio and set it up for the guests to watch the Plaid Let’s Paint Live video! Wow. It was perfect! Everyone could really see and hear the video. Of course that left me talking the other half of the guests through the Cat painting; but it worked well.
Most of the moms and girls painted their own. Some painted the same design and some different. It was great to see all these mothers and daughters getting crafty together. I was amazed at the attention and detail the girls were putting into their paintings. This was one party that seemed like it was over too quickly. We were having a great time.
My daughter loves having her face painted. She begs to have it done when she sees the artists out. She asks me to buy paint so we can do it at home. I’m overwhelmed by the thought of choosing a brush or sponge, mixing the paint to the right consistency, and then cleaning everything up. When the Snazaroo Paint a Smile for Summer Party was announced by Tryazon I applied right away. What a simple solution to enjoy some face painting fun! I had to try the Snazaroo Face Paint Pens.
I was super excited to be selected to host a Snazaroo Paint a Smile for summer party through Tryazon on June 2. I combined it with my daughter’s cat themed birthday celebration we were already planning. It was a perfect match up.
The party started off with a treasure hunt. I had written clues and puzzles that lead the kids around our yard. They got treasure of ears and tails on the way. I ordered the cute fuzzy cat ear headbands from Amazon. The tails were made from boas I had cut and name badge clips.
The final treasure was the Snazaroo Paint Pens. The kids were so excited. We twisted the paint up to the brush tipped pens and the fun began. The pens were so simple to use. The kids enjoyed painting hearts, stars, and other designs for their friends. Of course, noses and whiskers were painted too.
The gold and silver Snazaroo Face Paint Pens have a great shimmer almost glittery appearance to them when they dried.
I prepared snacks fit for all the cats in attendance. A trailmix of every kind of fish cracker plus Swedish fish, fresh fruits, and pawprint cupcakes.
I left the pens out for the whole party. As the kids played and snacked they kept adding to their body paint designs. One girl painted her whole arm mostly black. I’m pleased to report that it all washed off easily with soap and water!The adults even got in on the fun and let the kids paint their faces too. I have fairly sensitive skin and I did not react to this paint. Yay! The kids were excited to each take home a Snazaroo Face Paint Pen of their own. What a great addition to a party.
Laminating bookmarks and worksheets for after school practice.
I was super surprised and excited to be chosen to receive a Scotch™ Thermal Laminator Chatterbox from House Party. I still have my trusty old Aurora laminator from over 10 years ago that I used while running an evening kids program. I was curious to see how the Scotch Laminator stacked up.
The Scotch Thermal Laminator TL902 warmed up faster than my Aurora. It has a rear loading tray, and a profile similar to an old bubble jet printer. I suppose this lends itself to fitting in on a desk top well. But I don’t have a work desk, so the rear loading took a bit for me to get use to. One page bent as it was going in even though I loaded the sealed end of the lamination pocket first. I had another page go in crooked even with the page guides, but it turned out alright.
The Scotch Thermal Laminator TL902 has buttons so you can select 3mm or 5mm depending on the thickness of your project you are laminating. However only the laminating pocket thickness was shown on one of the 3 packages I bought to use. It defaulted to 3mm. I didn’t change the setting and it worked well for the plain paper I was laminating, as well as the slightly thicker bookmarks I ran through.
Laminated morning and evening checklists
I printed the kids new morning and evening schedules for this school year and laminated them. I’m still considering how best to include an expo marker so they can check the boxes. I’m also considering the clean up involved with having a dry erase item hung on the wall. Maybe those large check boxes will just be for looks.
I had lots of generic 3mm lamination pockets from 10 years ago. I tried them in the Scotch Laminator. They worked well. That’s nice because I already have a bunch of those, and buying the Lamination pockets can get spendy. Thankfully the chat pack included coupons for Scotch pouches.
The Chat Pack also included a second Scotch Thermal Laminator TL902 to give away to an educator! I’m having a hard time deciding who to gift with this fun package. I know so many educators. I do know of a newer teacher who may not have acquired such a handy tool yet. It might head that way!
Thank you Scotch, House Party, and Chatterbox for the great Chat Pack. I love laminating and am still hunting for more projects. 🙂 I’m thinking laminating pressed flowers is up next!
For Little’s second birthday I put together a Hello Kitty birthday party for her at the park. She called her Hello Meow Meow then. What is it that draws a kiddo’s attention to what they love? From the first moment she caught a glimpse at the store, she was in love with Hello Kitty.
I wanted to make her birthday full of Hello Kitty fun. I also wanted to make treat bags that were going to be fun for more than a day. I used the small white bags at Hobby Lobby and bought enough with coupons for our attendees. My plan was to freezer paper stencil Hello Kitty onto the bags. I put stacks of freezer paper under an image that I had printed from online to help me cut out her features. I hadn’t finished cutting out one eye before I was dreaming of having my own Silhouette. Maybe someday I’ll own one. By the time I finished cutting out all the stencils I’d given myself a pretty good blister, but it was worth it. The cardboard inside the bags keeps them stiff so the stencil sticks well. It also helps for better paint application. After the painted bags were dry, I removed the stencil and gave them a quick iron to set the paint and started stuffing them with goodies.
The bags were filled with Hello Kitty goodness; stickers, temporary tattoos, cake topper rings, special candy, and bows just like Hello Kitty wears. I made the bows with the 2 1/4″ red ribbon I used on my Rainbow Brite dress. Before I started sewing, I sealed all the ends with a lighter so they wouldn’t unravel. The best part about making Hello Kitty bows is they are lopsided, so you don’t have to worry about getting them perfect! I hand stitched them onto the barrettes so they wouldn’t always be sliding off. They were so cute!
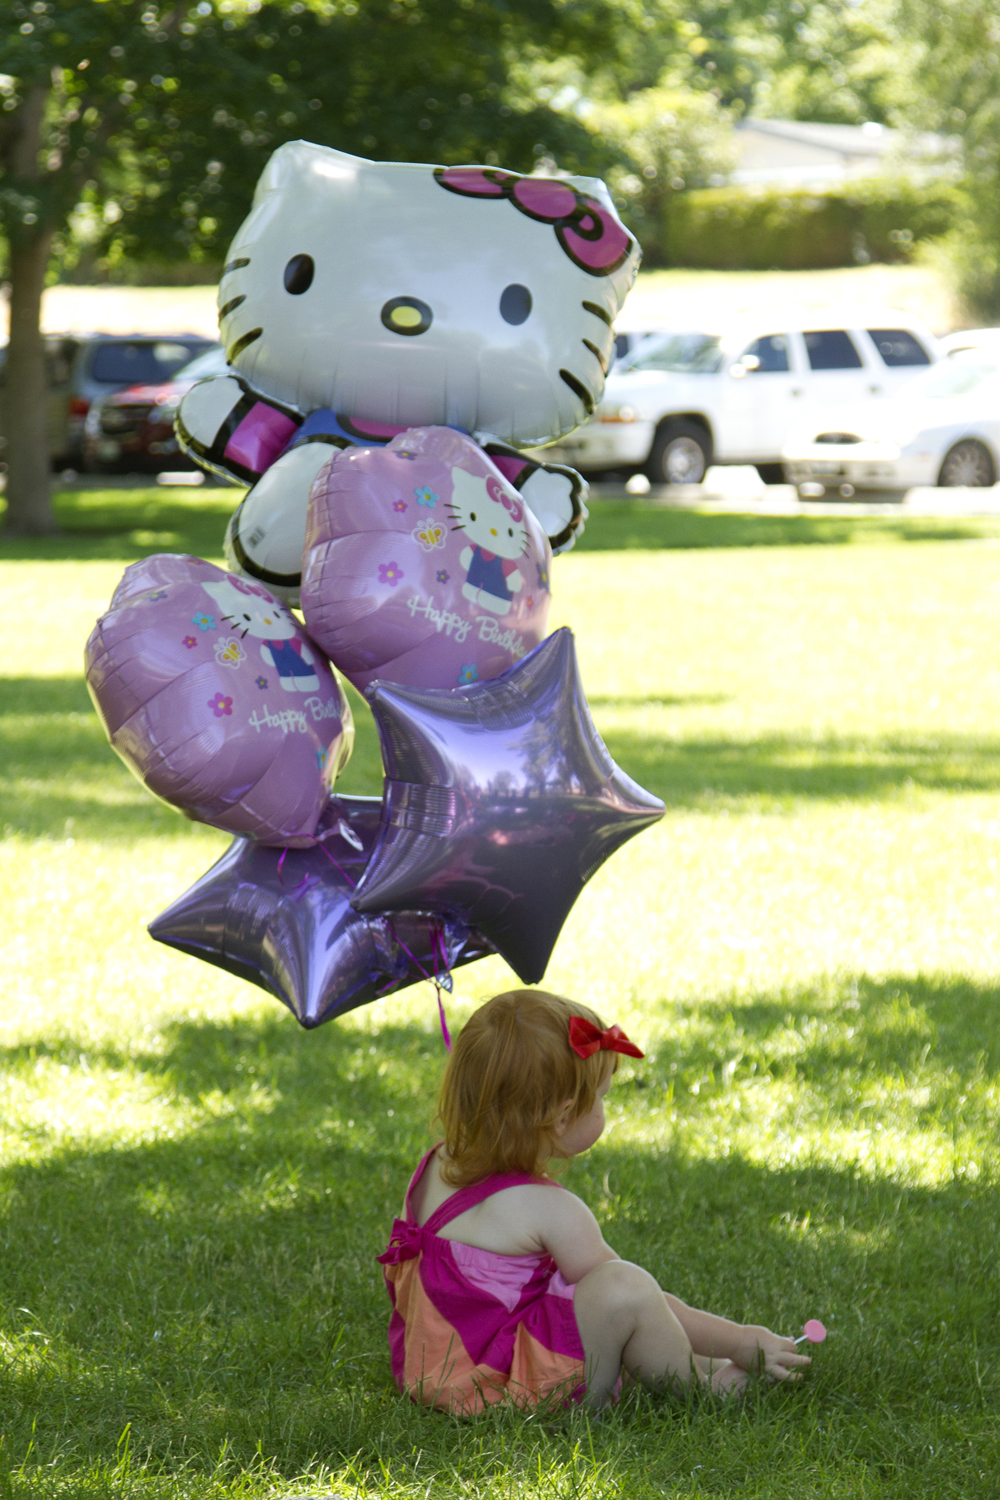
For an extra special treat I ordered a Hello Kitty Mylar balloon bouquet for Little. It was crazy big and took a ton of helium to fill. I didn’t realize how much it would cost to inflate the balloons, but it was worth it. Little loved the balloons and was so excited to carry them around the park. The large Hello Kitty balloon was nearly as tall as her. I used a stainless steel straw to flatten the balloons when we were done enjoying them. Maybe one day we’ll use them again.
We had a lot of little boys we invited to the party. I didn’t want them to feel left out so I made them Green Lantern treat bags. I freezer paper stenciled the Green Lantern logo onto black bags from Hobby Lobby. I put super hero stickers inside as well as candy and some squinkies. They thought the Green Lantern rings were especially cool. If you’re ordering rings for boys, they are the way to go. I can’t believe they are currently out of stock.
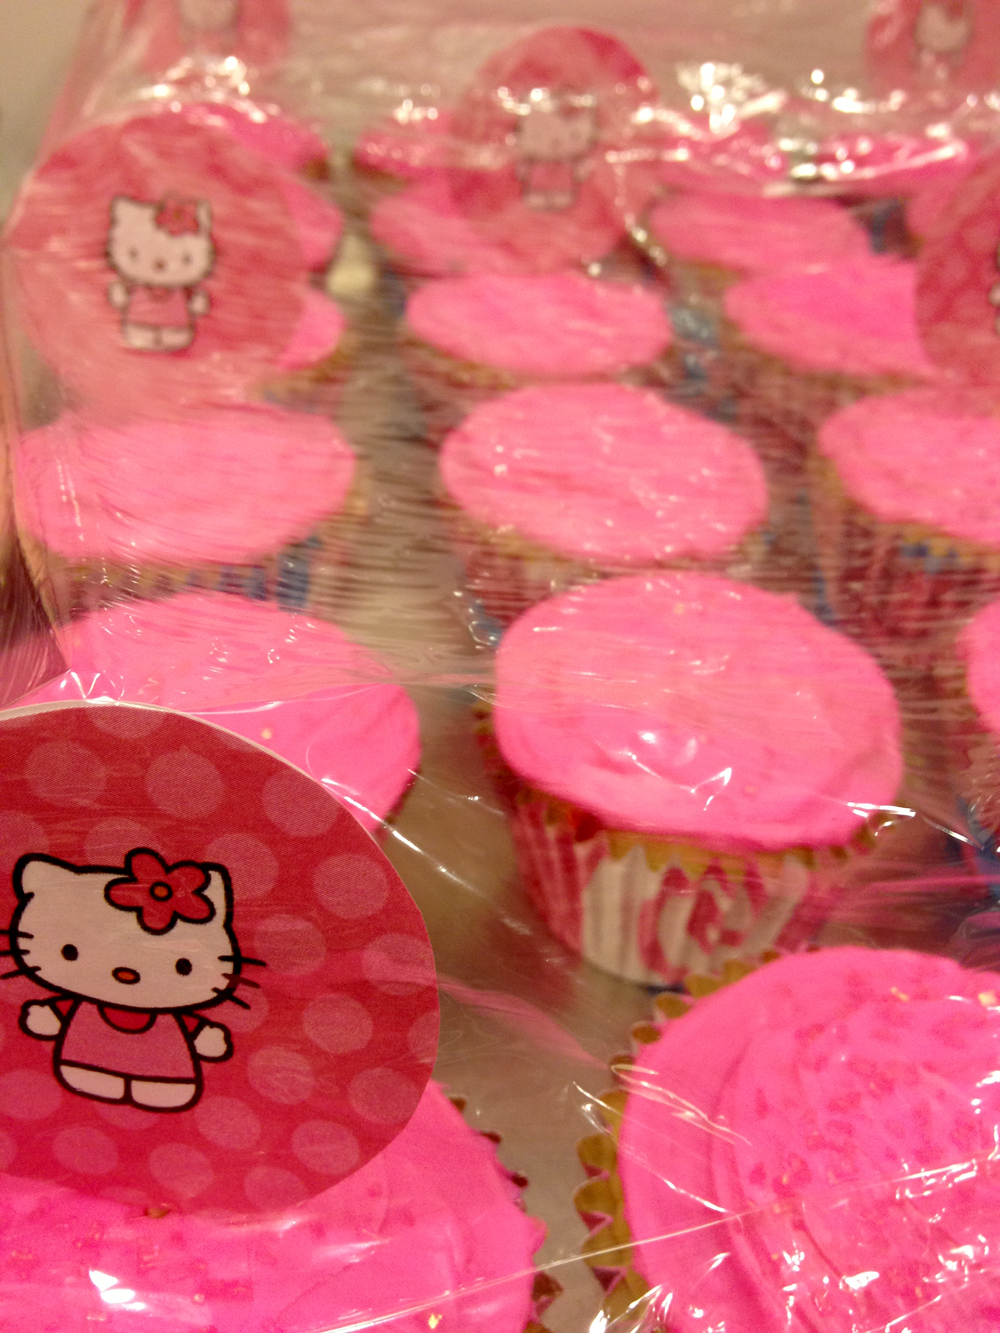
I made Funfetti cupcakes and used Reynolds staybrite wrappers. They are great to use for parties and special occasions and a fun break from the plain white ones I normally use. Pillsbury Funfetti Hot Pink Vanilla Icing was the perfect topping. I’m so glad they started making bright colored icing. I’m not sure I could enjoy cupcakes if I knew how much food coloring it took to make the icing vibrant! The pink sprinkles that come with the hot pink icing were a perfect sparkly addition. They have a slightly iridescent sheen to them. I printed out a few Hello Kitty cupcake toppers I found on pinterest. I made enough to add randomly so the saran wrap wouldn’t stick to the cupcakes and mess up the icing.
I over planned for attendees. There were so many left over treat bags! I handed them out to friends when I remembered, but by the time November rolled around I still had a bag of bags on my desk. I grabbed them on my way to pack shoe boxes for Operation Christmas Child. I hope they brought smiles to all the kids who received them.
I feel like my son’s 5th birthday snuck up on me. I was so busy worrying about our costumes that I completely forgot his birthday is soon after Halloween. Last year he was sick with the croup twice in a row so we canceled his birthday party. It was two months later when he asked me if he was going to have a birthday party. Ouch. This year, I wanted to make sure he had a super birthday party.
Turbo said he wanted to have a LEGO Hero Factory party. I wasn’t quite sure where to go with that so we sat down and searched Pinterest for ‘LEGO Hero Factory party’ ideas. As you can imagine nothing came up. I asked him if it would be okay if we narrowed our search to ‘LEGO Party’ and he agreed. So many cool ideas for LEGO parties have been pinned. Turbo sat with me and pointed out ideas he liked and wanted to have at his party. The first thing he pointed out was a race car ramp. We checked out cakes and cookies. When I asked him if he wanted a cake or cupcakes he knew he wanted a cake. I’m not much of an artisan with cakes. I offered to make him a LEGO Brick cake and he thought that would be cool. *whew* We found a cool LEGO Bingo game that he said he’d like to play.
I did come up with one of my own ideas, a Pin the LEGO Piece game. My mom always made a pin the piece game for parties. The one I remember the best was a Wonder Woman she made for my sister’s party. She free handed all the pieces. I’m much better with technology and I’ve been dying to find a reason to have a large engineering print made.
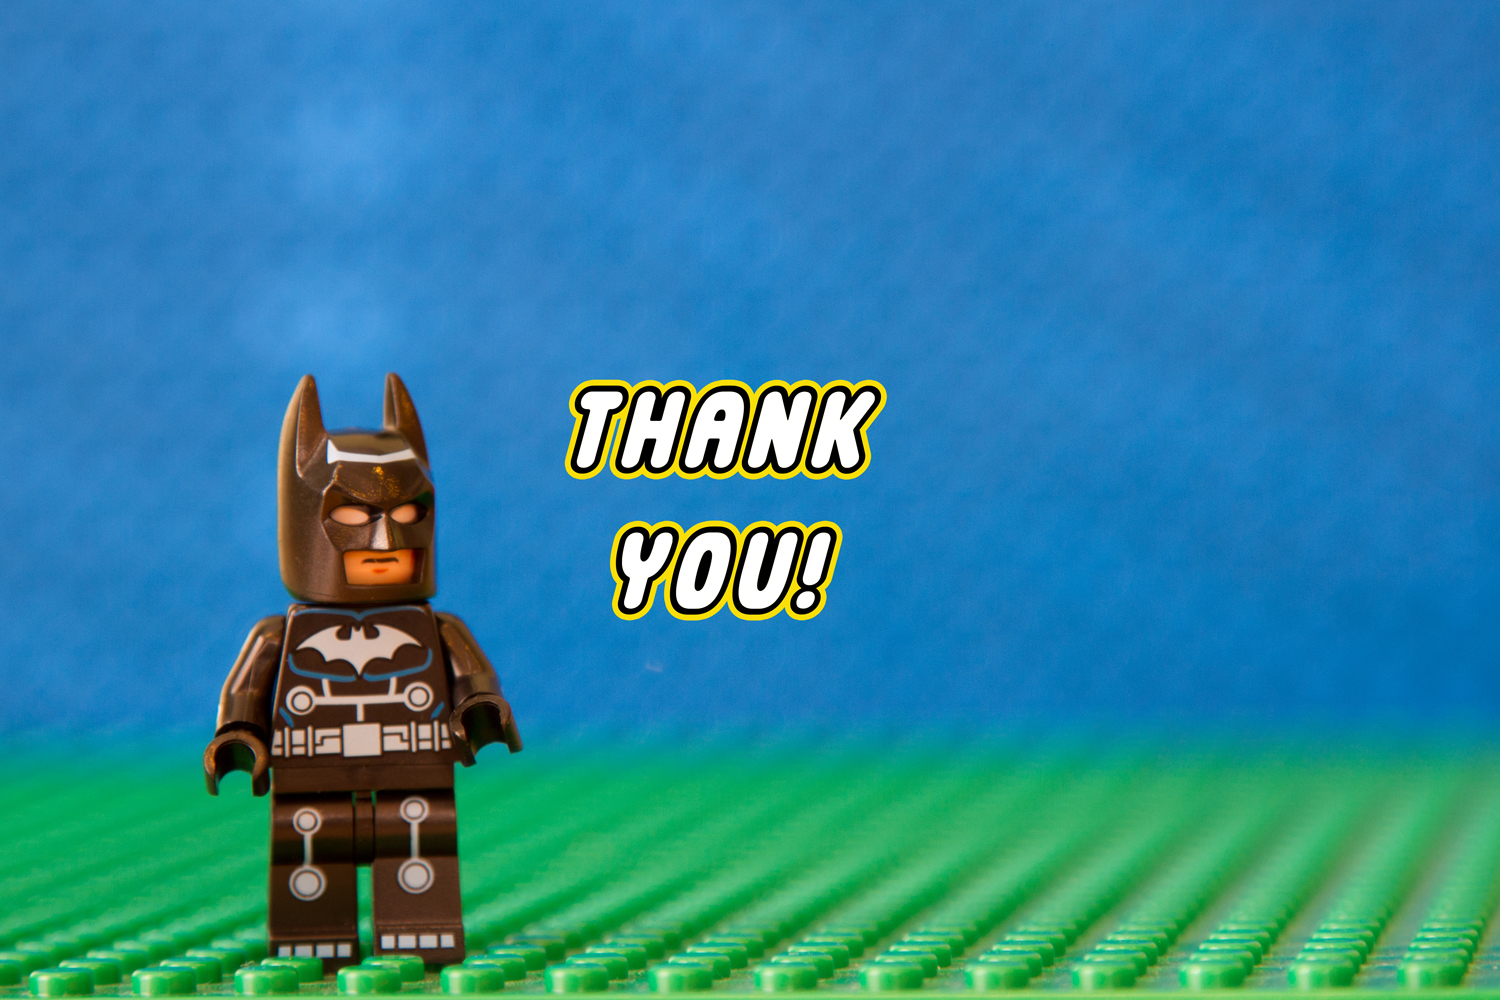
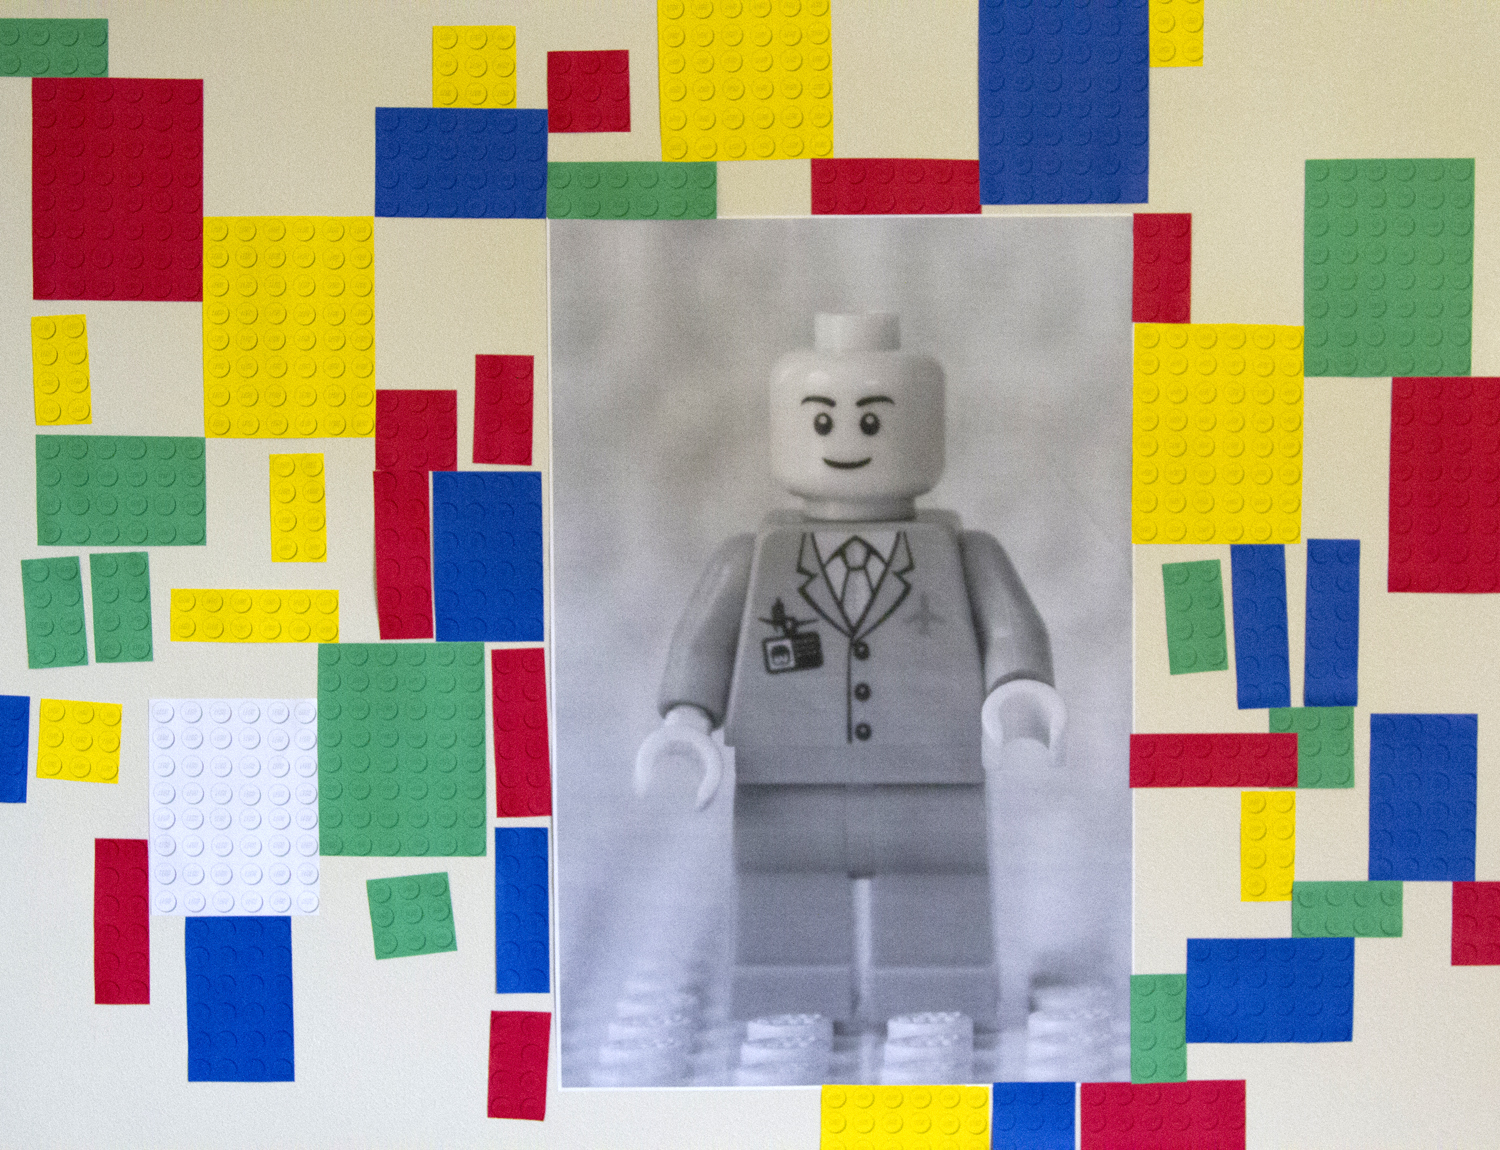
I set up a LEGO piece photo shoot. I shot the image for his invitations and a close up of a standard LEGO man for the pin the piece game. Then I took super close up shots of as many tiny LEGO accessories as I could find; hats, fish, cups, flasks, stars, hair, and a diamond to name a few. I sent the LEGO man photo to Abadan, our local print store, to be printed as a 2×3 foot engineering print. It looked so cool! I printed out the accessory pieces at home, trying to make them the right size for our large engineering print out. Little was a good helper. She grabbed the print outs and brought them to me as I was printing them. She loves retrieving paper from the printer. Turbo was super excited about his party and carried around the printed LEGO pieces until I put them up so they would be ready for the party. I found a LEGO font to use for the invitations and thank you cards. I had the images to be printed as photos. I stuck the invitations in envelopes as they were. Turbo helped me glue the thank you photos to cards so he could write in them.
Turbo was keen on the LEGO Minifigure Bingo game. As I scrolled through the call cards and boards I thought about replacing some of the Minifigure images with ones my son would know and his favorites like Batman. I have Adobe Acrobat, so switching out a few images and text wouldn’t be a big deal. Well, after I had added Turbo’s favorites, reorganized the board layout to be more like traditional Bingo, and added letters to the call cards it might have been less work for me to have started new! I found most of the Minifigure images from the LEGO website and searched the web for some too. Here’s my version of LEGO Minifigure Bingo(.pdf 3.2Mb) call cards and boards. I printed the call cards full size and the boards 2 to a page on card stock. Then I laminated the boards and we used dry erase markers with them. It was a hit at the party and we ended up playing the game for several rounds two different times.
My sister and I were chatting the day before the party and she asked if there was anything she could do. “Yes! Do you have any colorful paper at your disposal?” I asked. I really wanted to print out the LEGO Bumps from Deliacreates, but was running out of time to get things done before the party. Thanks to my sister we had a great colorful wall of LEGO bumps. Turbo enjoyed helping us hang the brick bumps on the wall. We used the bumps to wrap the juice boxes like bricks too.
When the kids arrived they could build a crown with the LEGO bump paper, race LEGO cars down a ramp, and free play with the LEGO bricks we set out. I sorted out wheels and axle type pieces from the majority of the bricks so they could build their own vehicle creations easily. There were a few pre-built LEGO cars ready for racing. We used a piece of press board for the race ramp. It wasn’t nearly as big as the table ramp we saw on Pinterest, but if fit our space and Turbo was pleased with it.
There are so many cool ideas for putting together the gift bags. I’d nearly run out of time for putting the party together, so for the gift bags we splurged. I bought the bagged LEGO sets I found by Target’s checkouts. This was our biggest expense. If only I had bought a bunch of those box sets I found on clearance for $2.50 a while back; oh well right? I printed out activity pages from the LEGO website, two on a page, and made a little activity booklet to include with the building sets. You have to search within each LEGO product line website to find their printable stuff; LEGO City had the most.
One of the hardest parts of planning the party was deciding on a guest list. I’ve always had this idea in my head that you should only invite as many guests as you are old. Turbo was turning 5 and he has more than 5 friends. It was hard not to invite all his friends. Even after we sent the invitations I kept worrying that we should invite more people. I think it was okay that we didn’t invite a ton of kids. The party size was good and it was enjoyable, not overwhelming.
I framed the engineering print and hung it in my son’s room. It’s a nice reminder of all the fun he had at “the best birthday party ever!”
One year ago I pinned an image of the cutest Halloween costume ever; Rainbow Brite and Twink. Little was almost 6 months old and I knew, even though I hadn’t dressed up for Halloween since 2000, in 2012 I was going to be Rainbow Brite and Little was going to be my sprite, Twink.
I guess I should have known, but something that wasn’t mentioned in the original Twink Tutorial by pinksuedeshoe was how much the fuzzy fabric sheds. When the lady at JoAnn’s was cutting the fuzzy fabric for Twink it was a mess. She grabbed her cleaning cloth and said something like “if you vacuum the edges as you cut that should help with the mess.” I vacuumed the edges as I cut, and got quite a bit of fuzz.
I thought I had the shedding under control, but after sewing the pieces together, which needed to be pinned like crazy, I still looked like someone had given a polyester Persian cat a haircut on my lap. Before I sewed the fuzzy fabric to the fleece lining, I madly shook the pieces outside. Then I washed and washed and rinsed and rinsed them in an attempt to get rid of the shedding fibers but they were still shedding everywhere. Tiny shiny threads glistened all over me and my floor. I’ve got about 3/4 of a yard left that I’ve quarantined in a plastic bag in the garage. I’m contemplating throwing it in the trash. Which says a lot. I usually keep every tiny last scrap of fabric that I can.
I got the lining sewn to the fuzzy fabric. I was so tired of the mess I decided I wouldn’t stuff the costume with fiber fill. It looked poofy enough. I skipped ahead to the elastic around the bottom section. I broke two needles. Oh my gosh! The pattern directed me to turn and stitch. In addition to going over the seams, It was too much fabric for my machine to handle! I ended up not worrying about turning the edge under. The fuzzy stuff was a knit, so it wouldn’t unravel, and the fleece lining would be fine too. I didn’t stitch over the seams either. Finally I got it done. I felt like a champion who had made it across the finish line.
Instead of using the hook and loop closure the pattern called for I used my KAM pliers. Using my KAM pliers is easy and fun! I am going to use them every time I get the chance. Like for Twink’s belt, bam! KAMsnapped it.
Little didn’t care for the hood, but she did end up wearing it a few times. Mostly when she was outside and it was cold.
With the kid’s costumes finished I could start mine. I thought I was going to have to sew a blue dress and even went so far as to find a pattern in my stash that would work. Then I remembered the bright blue bride’s maid dress hanging in my closet. I hadn’t worn it since my best friend’s wedding in 2001. It was perfect to turn into a Rainbow Brite dress. I started by sewing a satin blanket binding to the bottom of the skirt. Then I measured up from the bottom of the skirt and sewed a long running stitch where I wanted the waist to be. I gathered the skirt in and sewed it to a wide red ribbon. I kind of messed this part up. I had measured how wide the skirt should be, but since I was sewing the morning before the preschool party where my son expected Rainbow Brite and Twink to show up, I was in a hurry and satin is slippery. As I was sewing the red ribbon to the bodice I had to make tucks to take into account my sloppiness. I kept telling myself “it’s a Halloween costume. If you wait until it’s perfect, you’ll never finish.” Plus, I’d never gotten to a point where I could wear it that afternoon.
While I was hurrying to zig zag around the cut edge for the arm warmers I sewed through my finger. Something I have never done before. It went right through the callous part by the edge of my nail on my pointer finger. Hopefully I have learned that I should not be sewing this close to a deadline!
I attached star patches to the blue shoes that I wore with the dress the dress the first time. And sewed another to a blue ribbon for my pony tail.
I thought about adding more detail to the dress. I had extra fabric in the form of a wrap. I thought about making it into sleeves and cuffs, but the dress ended up looking so cute the way it was I stopped. I was afraid if I kept going I’d make it look too cluttered with all the details and it wouldn’t be so cute then. Plus, I was out of time.
I had fun being Rainbow Brite. I wonder if I can convince Little to be Twink again next year…
Halloween is nearly here! I’ve managed to create a costume which transforms my son into Batman, the Dark Knight. We used a freezer paper stencil to paint the Dark Knight emblem on a black long sleeve t-shirt. For the color I mixed black with a little silver paint so the design would show. My son painted his shirt and I helped smooth out the inconsistencies. I made him felt gauntlets. The black gloves he picked out from REI this summer are the perfect touch. I used Simplicity pattern 5927 as a guide to sew the cape. I wanted larger scallops at the bottom of his cape so I used a large dinner plate to draw them out with a white crayon. I used 4 yards of costume weight satin and sewed the shiny sides to the inside. There was no way I was going to hem that much satin. I had to improvise on the cape collar. Turbo let me know velcro was not his desired closure method so I got to use my new KAMsnaps pliers and snaps. For the utility belt, I used a large 2″ buckle from JoAnn’s with 2″ black nylon webbing. We used Blackberry cases to hold his gear. I know Batman’s utility belt is a sort of gold color. I tried to come up with something sort of gold and debated about spray painting it, but I think in the end it works just fine being black. To finish the look we bought a Batman mask that came with a batarang. The mask set a little too deep on my son. I glued old bike helmet pads in the mask to keep the plastic around the eye sockets from leaving marks. Turbo loves his costume. As soon as it’s on him his demeanor changes, and he becomes the Dark Knight.
I was wondering if I would have the energy to make fabric bunting for my Little’s first birthday. I started cruising through Etsy to see if I could find some that I wanted to buy. I found several floral, vintage themed ones I wanted to buy. The more I looked, the more I wanted, the more I knew I had to make some. For the price of two I could make 5 longer banners with larger flags. I was blessed with a friend who brought her bunting by. I immediately hung them in my living room for inspiration. They made me smile every time I looked at them. Thank you friend!
I remembered reading on Joy’s Hope about her vintage sheet supplier. I fell in love with the beautiful vintage floral prints. My Grandmother had several of the sheets listed. Desire got the best of me and I ordered more than I needed to make 5 banners plus a flat floral sheet to use for a table cloth!
After cutting several pieces of paper in different dimensions, mulling it over with my sister, and staring at the bunting hanging in my front window, I finally cut 80 triangles, 9″ tall with a base of 8″. The stack was beautiful and impressive!
Sewing them right side together in pairs went quickly. When it came time to turn them I began to doubt myself. They were not looking right. Should I have sewn them wrong sides together and been done with it like this tutorial? I turned a couple and was frustrated trying to iron them flat. I made sure I was clipping my acute corner correctly. I thought about it for at least a day. Then the answer hit me. I needed something to shove inside my sewn triangles so I could iron them well. I cut a cardboard triangle from a cereal box to use. It worked like a dream. I could press forward with my creation.
I stitched around the edge of my triangles to add a special finished touch.
All the fabric bunting I saw used double fold biased tape, like this one. I’ve always loved grosgrain so I bought some when it was 50% off at Hobby Lobby and used it. I only had enough to finish 4 banners. I might try the biased tape on my last one and see how that looks.
My sister hung the bunting for the party. I wish I had taken pictures of her climbing the tree and up on her husband’s shoulders!
Happy Birthday Little Girl. I can’t believe you are one. We love you!


 I wanted to make her birthday full of Hello Kitty fun. I also wanted to make treat bags that were going to be fun for more than a day. I used the small white bags at Hobby Lobby and bought enough with coupons for our attendees. My plan was to
  The bags were filled with Hello Kitty goodness; stickers,