Fabric Party Hats

Fabric Party HatsLil’s first birthday is quickly approaching.  She puts everything in her mouth.  I wanted her to have a party hat she could chew on and I wouldn’t have to fish pieces of it from her mouth. I found a few tutorials for sewing fabric party hats.  One used interfacing, and the other used a serger.  I have a lowly Minimatic that is as old as I am.  I used the pattern from Jane of all Trades, and made my own mash of directions.

  1. I made a cereal box template from the Jane of all Trades pattern so I could sew these for everyone at the party if I acquire more Wonder Under and get some crazy burst of energy.
  2. Using the template, cut Wonder Under & reclaimed blue jeans to the pattern size.
  3. After ironing the Wonder Under to the wrong side of your top fabric, cut it out.
  4. You should only have 2 pieces now.  Put the right sides together.
  5. Pin the elastic where it was marked on the pattern.
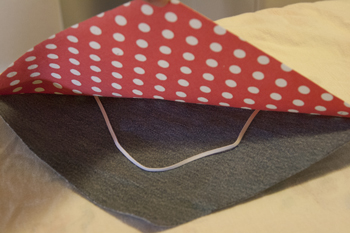
    Pin Elastic
  6. Stitch nearly 1/2″ around the curved edge.  Back stitch over the elastic to make sure it’s secure.
  7. Remove the paper from the Wonder Under.  Otherwise you will be cursing as you try and pull the little papers from along the seam you snipped.
  8. Snip along the curved edge.  Every 1/2″ will do.  I tend to get a little carried away and snip more frequently.
  9. Turn your wrong sides together.
  10. Press according to the Wonder Under directions.  Damp cloth, 10 seconds, iron to dry it a bit.  Try not to iron the elastic.
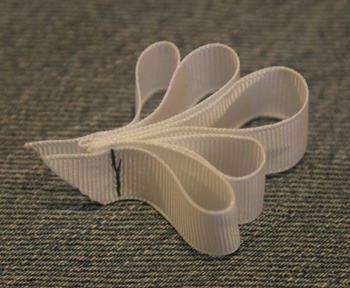
  11. Make a cute ribbon pom for the top.
    ribbon pom
  12. Fold the hat in half with the outside fabric facing in.
  13. Place the pom in the tip of the hat, pointing toward the curved edge, upside down, pin.
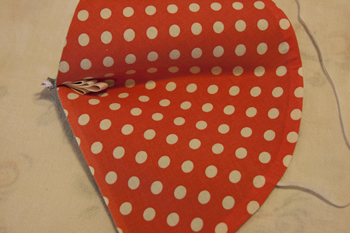
    pom placement
  14. Stitch up the straight side.  Make sure to sew the pom in well.
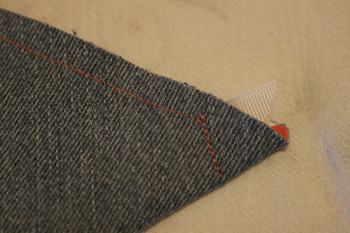
    stitching up the hat, secure pom
  15. Turn the hat right side out and admire your handy work.  Press the seam to one side.  Give yourself lots of praise for how cute it turned out.
  16. Find your little and try it on them.  Tie a knot in the elastic because even though you measured it, it’s still too long.
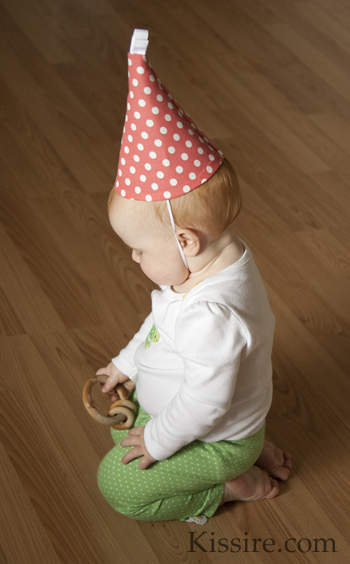
    Lil in fabric party hat

These could be embellished and made super cute for an older crowd; think fuzzy boa stuff!  I’m keeping it simple for the 1 year old.  I’m still keeping my eye out for some cute ribbon to add detail along the bottom of the hat, but it’s pretty darn cute even without it.

V-day is coming

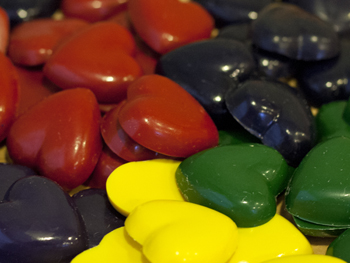
molded crayon heartsred crayon hearts in moldmolded crayon heartsI’ve been reading about making old crayons new and the cute valentines you can make with them. I finally picked up a heart shaped candy mold at JoAnn’s and knew I was close to actually melting crayons.  I followed the molded crayon tutorial at Homemade by Jill.  I’m super excited about how easy and fast this craft was.  I have a few notes to add.

  1. Use a sharp knife to cut through the length of the crayon wrapper.
    A commenter on the above post suggested this.  Do it! Do not wait until you’ve ripped the quick from under your nail trying to scrape the paper away from all the crayons.
  2. Keep the wax hot.
    I wasn’t pouring fast enough to fill the whole candy sheet before the wax started cooling.  Half way through I put my wax back in the water to heat it up again.  If you don’t keep the wax hot your crayons won’t be smooth and pretty.
  3. It’s Hot!
    Use a good hot pad or glove.
  4. Don’t worry about filling the molds completely to the top.
  5. If you go from light colors to dark, you really only need one, maybe 2 cans.
  6. When pouring, use your stirrer as a guide; like in chem lab.
  7. Let the crayons cool a bit, until they are not shiny, before you stick them in the freezer to speed cool them.  I did this so I wouldn’t slosh hot crayon wax everywhere.

molded crayon heartsWith the small heart mold I was using, the crayons were done fast.  After I stuck them in the freezer, it was less than 5 minutes.  By the time I was done unwrapping a few more crayons and melting them, I pulled the tray out of the freezer and the crayons fell out of the mold.  Then I was ready for the next batch.  My four year old didn’t loose interest until the 3rd batch.  He had fun breaking the crayons and was excited to tell his dad what he’d been up to. They make me so happy to look at.

My plan is to make square cards with an earth outline on one side and the words “you color my world.”  On the other some “happy valentine’s day from your friend.”  Or maybe I’ll incorporate Secret Agent Josephine’s B&W valentines. Combine that with tying them in tulle and I hope everyone will understand that they are born again crayons and not candy.

blackout curtains

Nearly a year ago when it started getting nice out it was getting harder and harder to get our son to sleep.  We went on a search for kid’s blackout curtains.  We found some at Target, but they were not exactly what we were looking for.  I shopped JoAnn’s for fabric and didn’t find anything I liked until near the end of the summer.  I purchased the fabric and then found the perfect tutorial for making blackout tab top curtains!  The fabric has set in my closet in a bag since then; until today.  I’m washing the fabric, measuring the windows, and reading the instructions over and over again so I can finally get the curtains ready for this summer.

I purchased the fabric before I had a pattern, measured the windows, or knew exactly what I wanted to do.  I bought plenty of the cute leaf pattern for the curtains, but I only bought 2 yards of the cute contrasting owls.  I thought the owls would be too much as curtains.  My son loved the owls as soon as he saw them.  He was much more interested in them than the leaves.  I can’t blame him, they really are cute.  I figured JoAnn would be all sold out since nearly a year has past since I first purchased the fabric.  I called the store before I drove out there.  They still had the owl fabric, enough for me to make curtains and have some to play with!

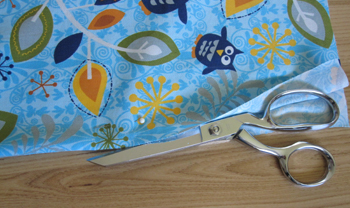
scissors cutting fabricI was intimidated by the many long straight cuts I’d have to make to piece together the panels.  I found a technique that worked great for me.  We have laminate flooring so I cleared and cleaned a large area to work on.  I folded the fabric where I would need to cut.  I carefully measured the length of the fold and pinned it in place.  Then I pulled my scissors through keeping everything as even as possible.  It worked great!

I still need to finish the panel for the other window.  All the pieces are cut and the right color thread is in the machine.  I keep hoping I’ll get an energy boost before baby sister gets here.

Comfortable Pants

My little man has the scrawniest waist.  He’s three, 40 inches tall, and his waist is only 18 inches.  Finding pants that fit him is hard.  I snagged two shirts my husband was going to get rid of to turn into some soft pants for him.  I thought I could make a pattern from an existing pair of pants, but I had trouble with that.

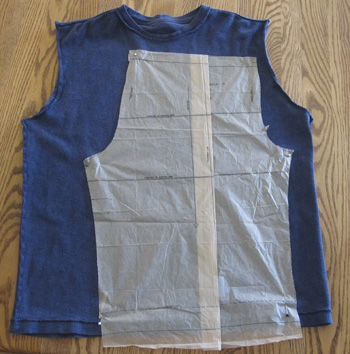
Pattern on shirt fabricI used Butterick pattern B5510 Large and modified the pattern for pant D.  I cut out the large size, leaving extra length to the bottom of the pattern paper.  Then I took in the width, 1.5″ at the waist and 1.25″ at the cuff.  I was able to fit the pattern in the body of the shirt and use the existing hem for the cuffs; yea for less sewing!  Since I didn’t need to hem the pants, I lined up the bottom of the XL length on the pattern with the shirt hem.  Then I mostly followed the pattern directions.  I left out the elastic around the cuffs and the stripes down the side.

My son was excited to try on his new soft pants.  I am excited to move several pair of 24 month pants out of rotation; they were much too short!

America!

finished paintI Am Momma – Hear Me Roar did a guest post on making a Captain America tee just in time to get me into the 4th of July spirit.  My hubby saw it and knew our little guy needed one.  I was excited to try it.  I’ve never done freezer paper stenciling.  This seemed like a  simple pattern to try it out.

Cutting out the stencil is much easier if you use a sharp X-acto knife!  I got it ironed down with a little fussing to get all the pieces aligned.  I didn’t want red paint to get around the star so I cut some rounded scotch tape to seal that part up. I Am Momma uses fabric paint, but since I have a plastic bin full of acrylics and some of that stuff that turns acrylic paint into fabric paint I used that.

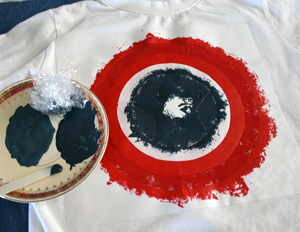
Captain America shirt  done!After all the set up the painting went crazy fast.  I was so excited to peel off the first ring around the star and see it all taking shape so nicely.  I thought my blue would be too dark so I added some white, but I didn’t like that.  The blue was perfect just the way it was.   I let the paint dry to the touch before pulling the stencil off.  Yea!  It looks great, aside from the red paint I dripped on the shirt.  I can’t wait to heat set it and run it through the wash.
Craft paint + toddler = success

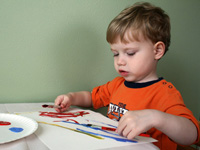
Painting with craft paintMy son has been noticing paint brushes; on TV, on signs, and outside the local art Gallery.  We had a couple yucky days this week.  After reading a post from Ashley Ann, I felt brave enough to take the plunge.  I covered the kitchen table with an old shower curtain and got my box of paints out.  I told him he could pick 3 colors.  To my delight he chose the primary colors.  He was a natural at dual wielding paint brushes.  He had so much fun.  He asked to paint again when he woke up from his nap; so we did.
Making fun bean bags

Instead of reading about crafts, I actually got crafty and made some bean bags!  I made two sets of four.

stiched bean bags inside out

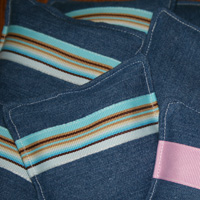
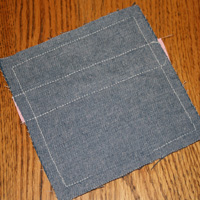
I started by cutting 5″ squares of a blue denim fabric I had from another project.  It would be fun to cut up some old jeans to use, but the jeans I had were thicker than I wanted for the bean bags.

I wanted to make the bean bags a little special so I cut 5″ strips of grosgrain  ribbon, one for each bag.

After sewing each ribbon onto a square of fabric, I placed the fronts together and sewed a seam between 1/4″ and 1/2″ around the square.  I left an opening so I could turn the bags right side out.   I didn’t back stitch around the opening, but next time I will.  It was a pain to get my stitches back in order before I finished the bags.

finished bean bagsI turned the bags right side out, and tried several different fillings: small white beans, corn, rice, and polystyrene weighted pellets.  I liked the weight and the sound of the corn the best.  I made a funnel from sturdy paper and put slightly less than 2/3 cup of corn kernels into each bag.
I finished the bags by stitching all the way around the edge of each bag.  I really don’t like sewing by hand and this way looks neat and finished.

happy-scrappy quilt giveaway!

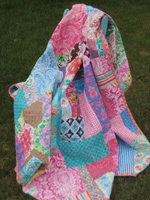
happy-scrappy quiltmarie-madeline studioThe Long ladies at marie-madeline studio are giving away a beautiful, machine quilted, twin-sized happy-scrappy quilt! Enter for a chance to win on their blog. Surf on over and check out their tutorials section and don’t forget to leave a comment!

The Long ladies are a close-knit, Christ centered, mother & daughters team. They have made their talent available through their online store front & Etsy shop.